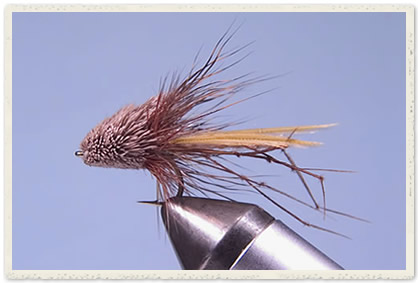
Muddled Daddy
September 20, 2007
Recipe:
- 10 - 12 Curved sedge hook
- 140 White UTC
- Knotted pheasant
- Furled tan wool
- Pair honey hackle points
- Brown cock
- Natural deer hair
Uses:
The Muddled Daddy is most useful during the weeks of late summer and autumn, when the bulk of craneflies emerge from the ground. The cranefly, or ‘Daddy Long Legs’ as it’s sometimes known, is a relatively laboured flier and often falls on the water where opportunist fish will take it. The illustrated pattern was designed for stillwater venues though it’s been used on running water with some limited success. Broadly considered a trout pattern it does work for other species like chub and bass (Leuciscus cephalus, Europe).
How to fish:
On stillwater cast to cruising and rising fish intercepting their feeding path with a static dry fly, sometimes with occasional tweaks. It can also be fished as a wake fly, retrieved to cause significant surface disturbance. Fish through likely feeding lanes from boat or bank. If fish come short to this pattern you may wish to change to a regular daddy pattern.
Tying instructions:
Toggle sequence Left/Right Handed ↔
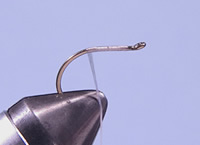
1. Start the thread behind the eye and run it to just past the start of the bend.
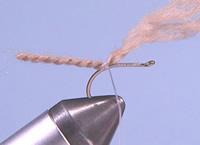
2. Tie in the furled body section over the butt of the thread layer just laid down.
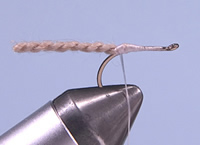
3. Cut away the surplus wool and make several turns of thread to smooth out the profile.
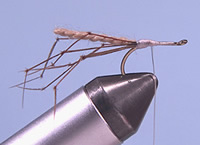
4. Now tie in two sets of three legs either side of the body so that they trail backwards. Stagger the legs in each set of three so the leg joints don’t all line up the same.
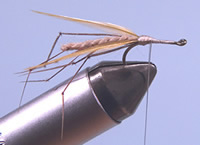
5. Prepare two hackle point wings and tie in flat and trailing like the legs to the back of the pattern.
6. Tie in a brown/red cock hackle and build a light but even thread base to wind the hackle on to. Before winding the hackle I like to add a small drop of varnish to the thread base so it is tacky when I wind the hackle. This is just for a little extra durability.
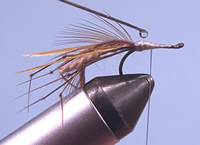
7. Make several turns of hackle, tie off and cut away the surplus feather.
8. Now build up a gently tapered thread base onto which you can spin and stack the deer hair. I like to add a little varnish to the wraps now to help create a more robust fly.

9. Tie in the first bunch of deer hair with the fine tips facing the rear of the fly. I prefer not to use a hair stacker but I do like to comb out the frizzy fine hair from the main fibres.
10. Spin the deer hair and tie in another bunch immediately after the first. Continue tying in and spinning hair until the hook is loaded right up to the eye. You may wish to add a tiny drop of varnish to the thread base, as with the hackle, for extra durability.
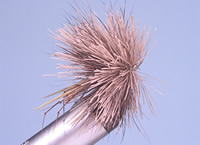
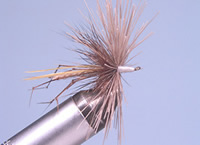
11. Whip finish. The fly should now look like a bottle brush!
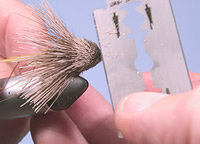
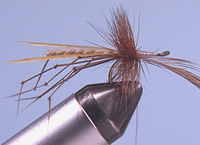
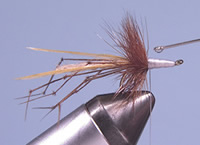
12. Trim the head to your preference. Whatever profile you choose the most important thing is to trim the underside of the head close to the hook shank so that the hair and hackle do not obstruct the hook point (see the main photograph).

13. From above the fly should end up looking something like this. Variations are in body colour and length, hackle and wing colour, and head profile/density. This version sits quite low on the water but still creates a wake if retrieved.
Variations:
The muddled daddy will often have the head trimmed to a compact ball shape accentuating the hackle. Tied on a long shank hook with a regular dubbed or herl body rather than an extended body, you have a fly which sits lower in the water and creates less surface disturbance when 'twitched.'
Be careful that the extended body is not so long or flexible that it can double up and catch on the bend of the hook.