Stacked Deer Hair Body
July 9, 2006
Explaining this technique is problematic at the best of times. In the long run you may find a visit to a fly-tying demonstration helps a deal more. In the mean time, hopefully I’ll manage to shed some light on how to stack deer hair. So, before we get started, if you don’t already have one, get yourself a table clamp base for your vice. It is possible to work this technique with a pedestal base, but it’s one grand pain in the neck! Standard applications for hair stacking are warmwater and saltwater patterns like divers, sliders, and poppers.
Tying instructions:
Toggle sequence Left/Right Handed ↔

1. For the base layer, cut a small bunch of hair from the hide, remove the fuzz with a comb or old toothbrush, then level the ends. At the gape of the hook this bunch of hair can be trimmed so it clears the hook as it spins and fans out.
2. Offer the hair up to the bare shank of the hook and make two or three loose consecutive turns around the bundle. Pull the thread tight and slowly release your grip on the deer hair as you do so, thereby allowing the hair to fan out round the shank.
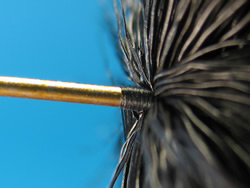
3. Wind the thread forward through the spun hair and make two or three locking wraps in front of the spun hair. Then wind the thread back into the middle of the spun hair.

4. Compact the spun deer hair by pinching the fly at the rear, offering resistance as you push the spun hair from the front with finger and thumb of your opposite hand. Add a drop of head cement to the locking wraps.
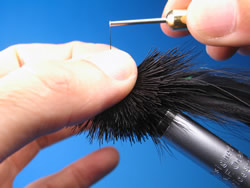
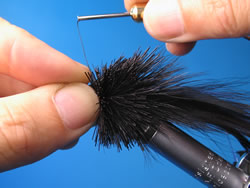
5. Take the tying thread to the top of the pattern, and flatten the spun hair with your index finger and thumb. You may need to move the thread to and fro in order to work the deer hair.
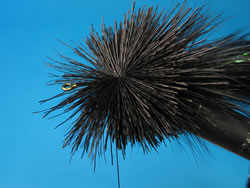
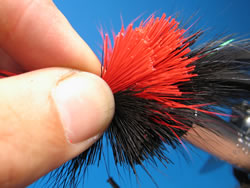
6. Bring the tying thread back toward you, ready to catch in the bunch of hair to be stacked. You now have a defined tying-in point and a clear bed over which to stack a contrasting colour of hair.
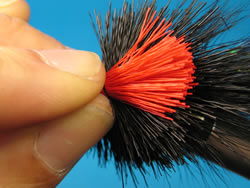
7. Offer up a new bunch of deer hair and take the tying thread around it a couple of turns. Hold the bunch of hair firmly in place while you draw the tying thread down tight. This prevents the hair from spinning and mixing into the hair below. Hold the thread close to breaking point.
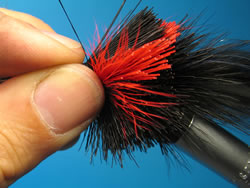
8. Release your hold on the new bunch of hair and it should fan out only partially. Take the thread through to the front of the hair and make two or three locking turns on the bare hook shank.

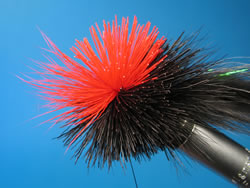
9. Compact the hair once again and add another drop of head cement.
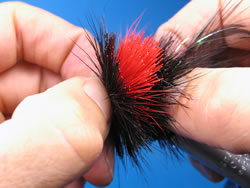
10. Offer up another bunch of hair and spin to form a continuation of the base layer.
11. Lock in the new base layer, take the thread back into the bunch and flatten it as in stage 4 above. Work the hair down away from the contrasting colour so the two colours don’t mix.
12. Then tie in another bunch of contrasting deer hair remembering to hold it in place as you tighten the thread. Then once again lock in the hair, compact it, and add a drop of head cement.
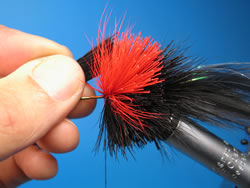
13. In this example, once again tie in more of the base colour.
14. Compact the hair one last time.
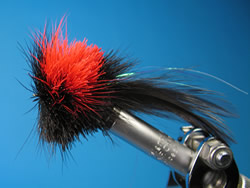
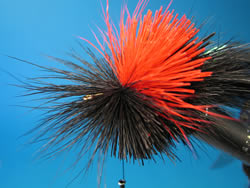
15. Whip finish and cut the tying thread. Cement the whip finish. You should end up with something like this.
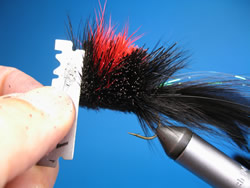
16. Now trim with a blade and/or scissors.
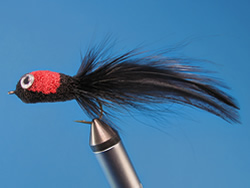
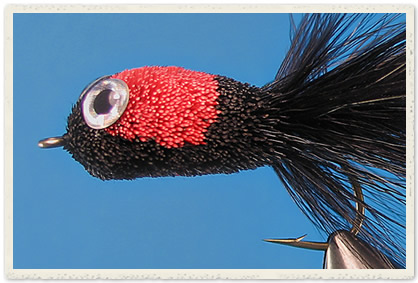
17. When you’ve finished trimming, you should end up with a colour design like this slider pattern.
Using strong rod winding thread, Size A or heavier, will help you achieve the thread tension when spinning and stacking, without fear of breaking the thread. The locking wraps of thread serve three purposes: they help keep the tying thread in tension and thereby prevent the head from twisting; they provide the chance to resume tying the fly should the thread break; and when plied with a drop of head cement they give you a more durable fly.